> ## Documentation Index
> Fetch the complete documentation index at: https://docs.mattildapayments.com/llms.txt
> Use this file to discover all available pages before exploring further.
# Google Pay on web without Embed
It is possible to use Google Pay on the web without our SDK. To learn how to integrate
Google Pay we recommend following Google's [tutorial][tutorial].
The steps below will highlight any differences and specifics for our API.
## About this integration
Even without Embed, there is only minimal configuration required to get set up to process Google Pay.
There is no need to sign up for a Google Developer account with this integration.
For Android apps which use this option with `WebViews`, please note that platform specific
Android Google Pay APIs must be invoked.
Please refer to [Google's FAQ](https://developers.google.com/pay/api/web/support/faq) for more
information.
## Enable Google Pay
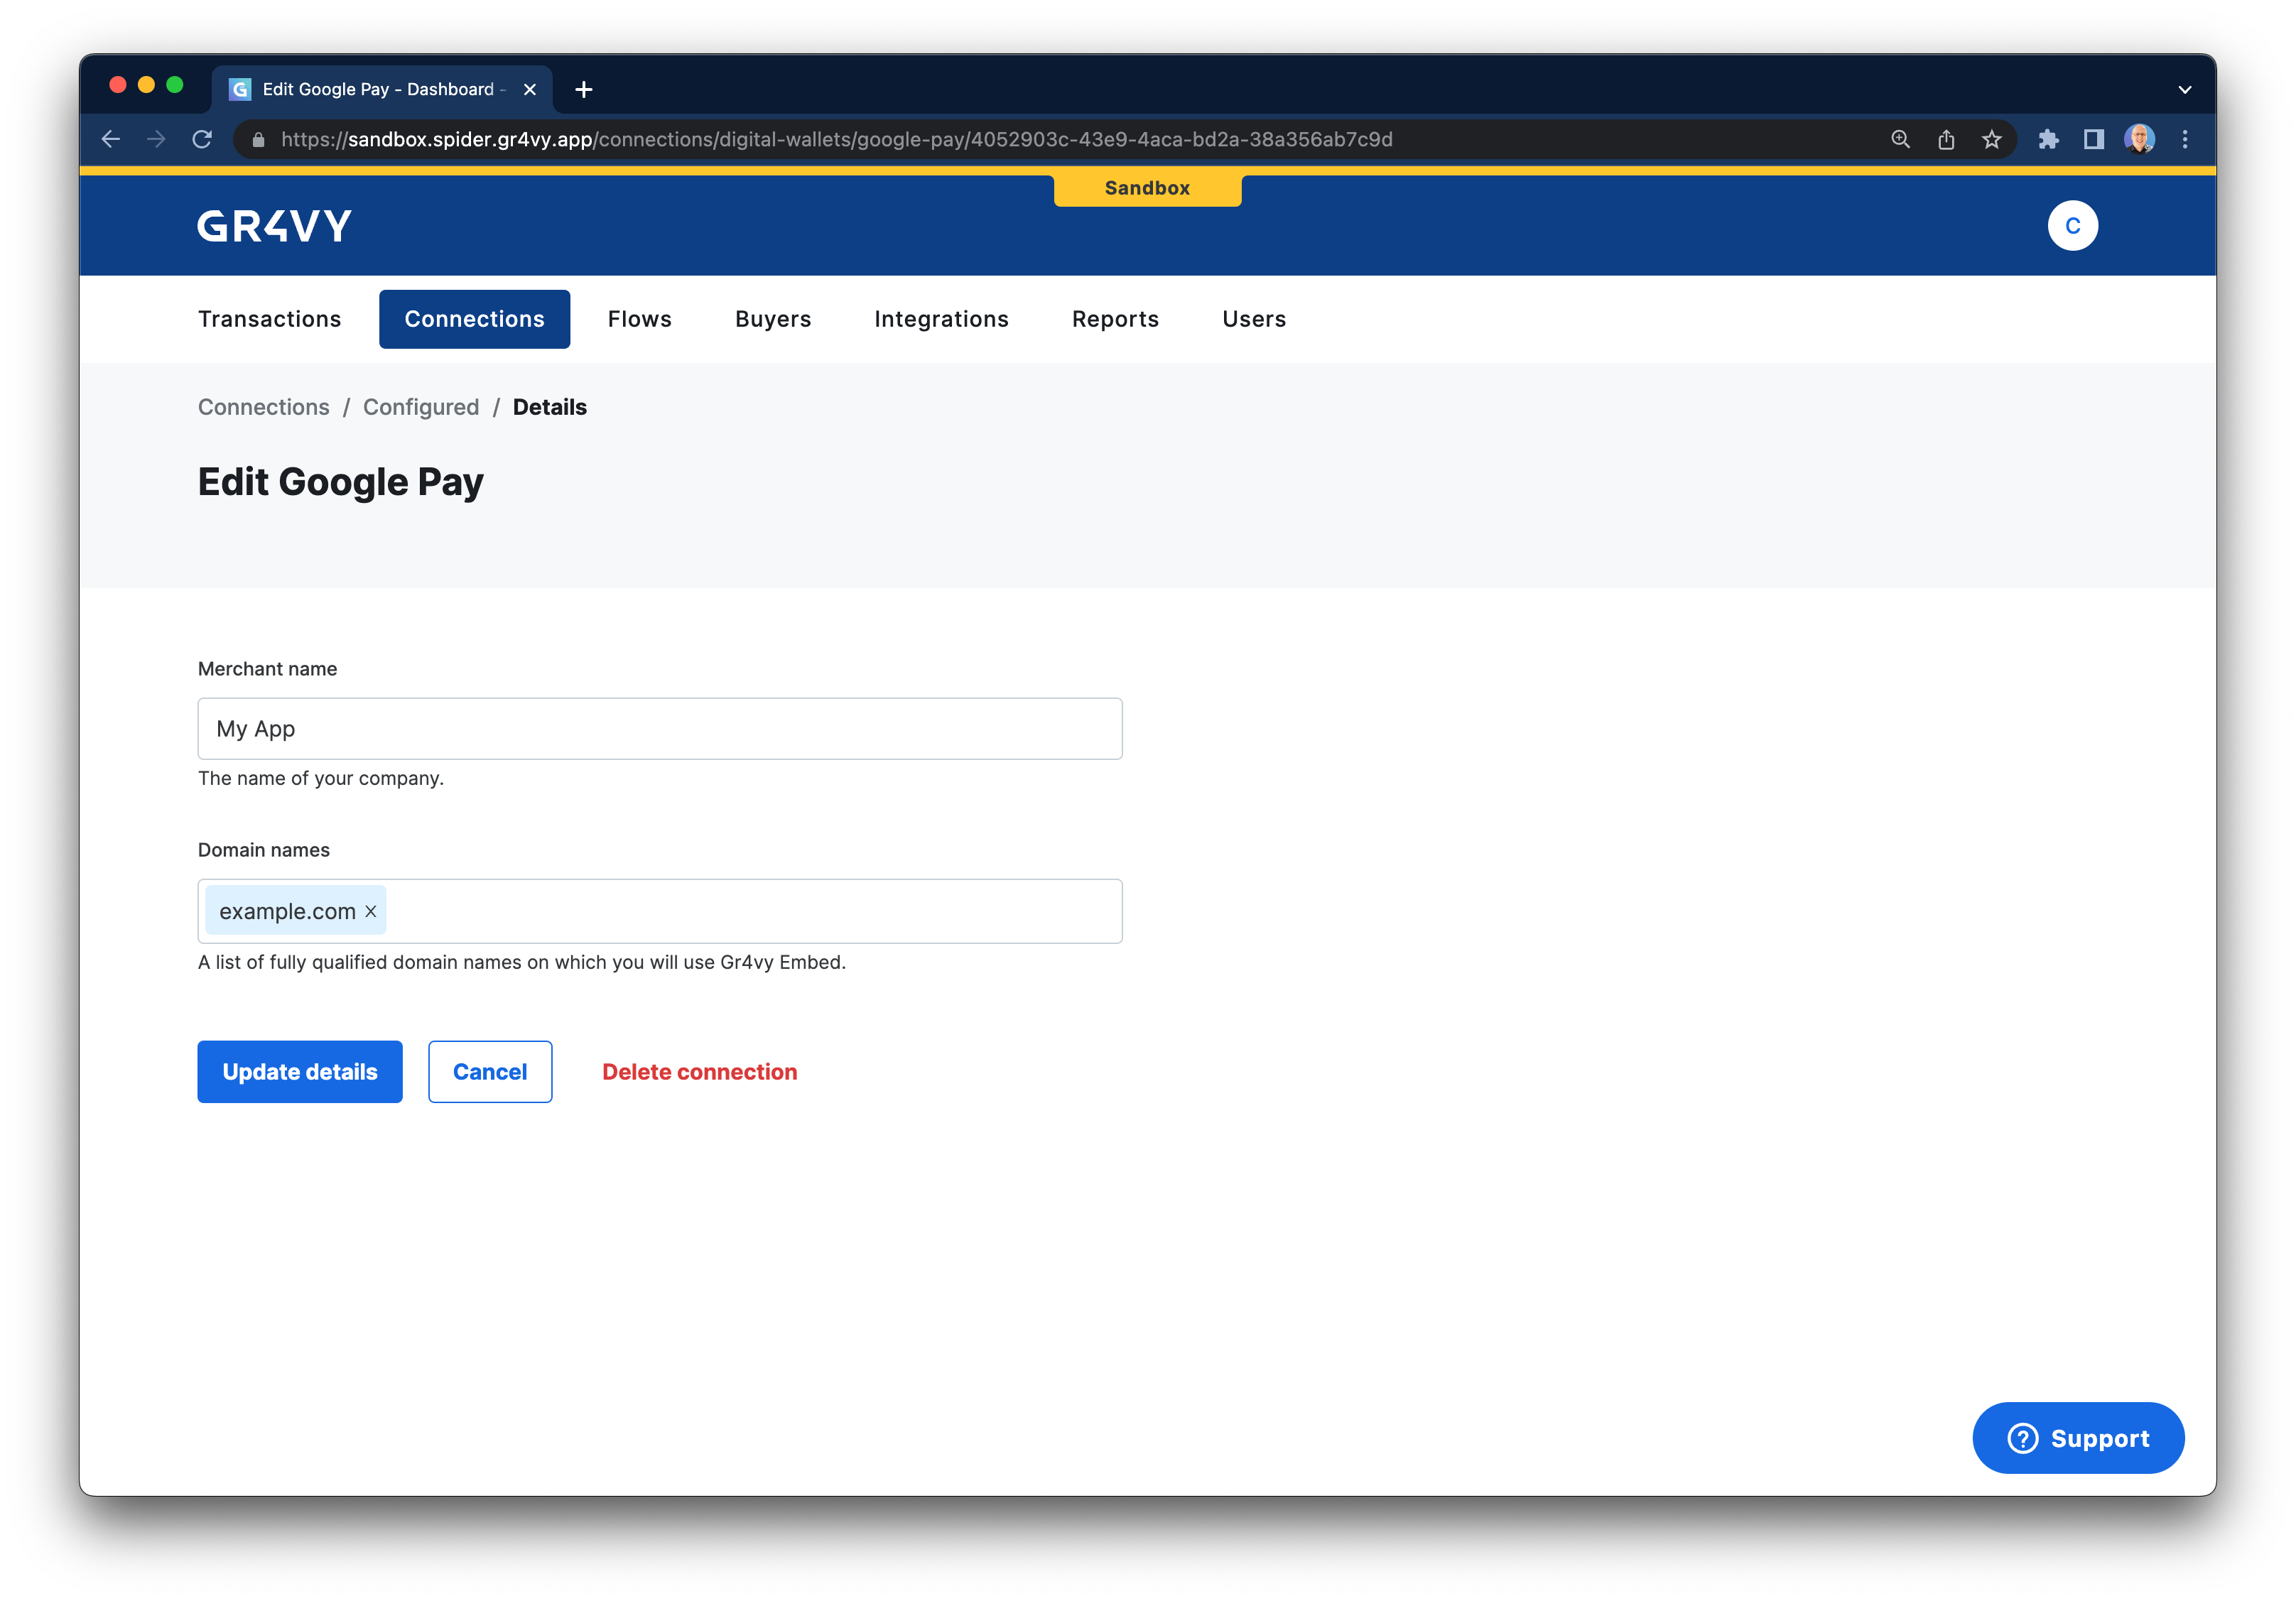
To enable Google Pay, head over to your dashboard and then go to
**Connections** -> **Catalog** -> **Google Pay**.
Next, fill in your merchant name and the domain name(s) where you want to
use Google Pay.
 ## Integrate Google Pay
The following steps highlight the integration points with our system using
Google's [tutorial][tutorial] for Google Pay.
### Fetch a Google Pay session
First, before you can render a Google Pay button, you will need to call our API to get a token and your Gr4vy gateway ID.
Call the [`POST /digital-wallets/google/session`](/reference/digital-wallets/get-google-pay-session) API with the domain you want to host Google Pay on. This needs to be the full domain including any subdomains like `www.`.
```json Request theme={"dark"}
{ "origin_domain": "www.example.com" }
```
This will return your gateway merchant ID as well as a JWT that authorized Gr4vy to run on your domain.
```json Response theme={"dark"}
{
"gateway_merchant_id": "app.gr4vy.sandbox.example.default",
"token": "eyJhbGciOiJFUzI1NiIsInR5cCI....NwRL9ZZg0N--ZyP6I0dDfHHoWhVkrHpQ"
}
```
### Set gateway and merchant ID
Next, in step 2 of [Google's tutorial][tutorial] you are instructed to request a payment token for your provider.
In our case, the value for `gateway` needs to be set to `gr4vy`, and the value of `gatewayMerchantId` needs
to be set to the value you received from our session API in the previous step.
```js theme={"dark"}
const tokenizationSpecification = {
type: "PAYMENT_GATEWAY",
parameters: {
gateway: "gr4vy",
gatewayMerchantId: "app.gr4vy.sandbox.example.default",
},
};
```
### Set the merchant info
Next, in step 8, you will need to set a `merchantInfo` object. This authorized Gr4vy to accept Google Pay on your domain.
When setting the `merchantInfo` object, make sure to set the `token` returned from our session API, your merchant name, our Gr4vy merchant ID, and the full domain you passed to our session API (including any subdomains like `www.`)
```js theme={"dark"}
const merchantInfo = {
authJwt: "eyJhbGciOiJFUzI1NiIsInR5cCI....NwRL9ZZg0N--ZyP6I0dDfHHoWhVkrHpQ",
merchantId: "BCR2DN4T7C3KX6DY", // This identifies Gr4vy
merchantName: "Example App",
merchantOrigin: "www.example.com",
};
```
**`OR_BIBED_11`** / **`OR_BIBED_6`** - If you were to encounter any kind of
`OR_BIBED` error you likely did not pass the right domain to our API, or you
did not pass the same domain to our session API and the `merchantInfo` object.
### Create a transaction
In step 10 of Google's tutorial, within the `onPaymentAuthorized` function
you will have a `paymentData` that needs to be sent to the gateway. You can send
this object to our [`POST /transactions`](/reference/transactions/new-transaction#google-pay-payment-method-create) endpoint either directly or via your server.
The payment method used needs to contain the data from the Google Pay payload.
```json Payment method data theme={"dark"}
{
"amount": 1299,
"currency": "MXN",
"country": "MX",
"payment_method": {
"method": "googlepay",
"token": "[paymentData.paymentMethodData.tokenizationData.token]",
"card_suffix": "[paymentData.paymentMethodData.info.cardDetails]",
"card_scheme": "[paymentData.paymentMethodData.info.cardNetwork]",
"redirect_url": "https://example.com/callback"
}
}
```
We strongly recommend always providing a `redirect_url`, just in case any
connection is configured to use 3-D Secure. This URL will be appended with
both a transaction ID and status (e.g.
`https://example.com/callback?transaction_id=123
&transaction_status=capture_succeeded`) after 3-D Secure has been completed.
## Test Google Pay
To test Google Pay visit the site that has your integration loaded on it. Please follow the Google Pay documentation with further guides on how
to add [test cards](https://developers.google.com/pay/api/android/guides/resources/test-card-suite) for use in
a sandbox environment.
[tutorial]: https://developers.google.com/pay/api/web/guides/tutorial
## Integrate Google Pay
The following steps highlight the integration points with our system using
Google's [tutorial][tutorial] for Google Pay.
### Fetch a Google Pay session
First, before you can render a Google Pay button, you will need to call our API to get a token and your Gr4vy gateway ID.
Call the [`POST /digital-wallets/google/session`](/reference/digital-wallets/get-google-pay-session) API with the domain you want to host Google Pay on. This needs to be the full domain including any subdomains like `www.`.
```json Request theme={"dark"}
{ "origin_domain": "www.example.com" }
```
This will return your gateway merchant ID as well as a JWT that authorized Gr4vy to run on your domain.
```json Response theme={"dark"}
{
"gateway_merchant_id": "app.gr4vy.sandbox.example.default",
"token": "eyJhbGciOiJFUzI1NiIsInR5cCI....NwRL9ZZg0N--ZyP6I0dDfHHoWhVkrHpQ"
}
```
### Set gateway and merchant ID
Next, in step 2 of [Google's tutorial][tutorial] you are instructed to request a payment token for your provider.
In our case, the value for `gateway` needs to be set to `gr4vy`, and the value of `gatewayMerchantId` needs
to be set to the value you received from our session API in the previous step.
```js theme={"dark"}
const tokenizationSpecification = {
type: "PAYMENT_GATEWAY",
parameters: {
gateway: "gr4vy",
gatewayMerchantId: "app.gr4vy.sandbox.example.default",
},
};
```
### Set the merchant info
Next, in step 8, you will need to set a `merchantInfo` object. This authorized Gr4vy to accept Google Pay on your domain.
When setting the `merchantInfo` object, make sure to set the `token` returned from our session API, your merchant name, our Gr4vy merchant ID, and the full domain you passed to our session API (including any subdomains like `www.`)
```js theme={"dark"}
const merchantInfo = {
authJwt: "eyJhbGciOiJFUzI1NiIsInR5cCI....NwRL9ZZg0N--ZyP6I0dDfHHoWhVkrHpQ",
merchantId: "BCR2DN4T7C3KX6DY", // This identifies Gr4vy
merchantName: "Example App",
merchantOrigin: "www.example.com",
};
```
**`OR_BIBED_11`** / **`OR_BIBED_6`** - If you were to encounter any kind of
`OR_BIBED` error you likely did not pass the right domain to our API, or you
did not pass the same domain to our session API and the `merchantInfo` object.
### Create a transaction
In step 10 of Google's tutorial, within the `onPaymentAuthorized` function
you will have a `paymentData` that needs to be sent to the gateway. You can send
this object to our [`POST /transactions`](/reference/transactions/new-transaction#google-pay-payment-method-create) endpoint either directly or via your server.
The payment method used needs to contain the data from the Google Pay payload.
```json Payment method data theme={"dark"}
{
"amount": 1299,
"currency": "MXN",
"country": "MX",
"payment_method": {
"method": "googlepay",
"token": "[paymentData.paymentMethodData.tokenizationData.token]",
"card_suffix": "[paymentData.paymentMethodData.info.cardDetails]",
"card_scheme": "[paymentData.paymentMethodData.info.cardNetwork]",
"redirect_url": "https://example.com/callback"
}
}
```
We strongly recommend always providing a `redirect_url`, just in case any
connection is configured to use 3-D Secure. This URL will be appended with
both a transaction ID and status (e.g.
`https://example.com/callback?transaction_id=123
&transaction_status=capture_succeeded`) after 3-D Secure has been completed.
## Test Google Pay
To test Google Pay visit the site that has your integration loaded on it. Please follow the Google Pay documentation with further guides on how
to add [test cards](https://developers.google.com/pay/api/android/guides/resources/test-card-suite) for use in
a sandbox environment.
[tutorial]: https://developers.google.com/pay/api/web/guides/tutorial