> ## Documentation Index
> Fetch the complete documentation index at: https://docs.mattildapayments.com/llms.txt
> Use this file to discover all available pages before exploring further.
# Salesforce Commerce Cloud Installation
## Before you start
It's recommended that you first install the Salesforce Commerce Cloud cartridge to a sandbox
instance that is an exact copy of your live store. After you have verified everything is
working properly in your sandbox environment, you can safely install the cartridge in your
live environment.
### Salesforce AppExchange
The Gr4vy [Salesforce Commerce Cloud cartridge](https://appexchange.salesforce.com/appxListingDetail?listingId=d2d4ce39-ea78-46c5-a260-1ce874f4a310) is available for free
in the Salesforce AppExchange.
### Install the cartridges
Upload the following cartridges to the Business Manager of your Salesforce Commerce Cloud instance.
* `int_gr4vy_sfra`
* `int_gr4vy`
* `bm_gr4vy`
Configure the cartridge path as shown in the below tables. Cartridges should be added to the
beginning of the cartridge path. The `int_gr4vy_test` cartridge can be added for testing the back office,
however, it should be removed after testing the integration.
| | |
| ------------------------------- | -------------------------- |
| Site Cartridge Path | `int_gr4vy_sfra:int_gr4vy` |
| Business Manager Cartridge Path | `bm_gr4vy` |
### Metadata
All BM configurations related to the below components have been configured within
`metadata/site-template` folder.
* System/Custom object definitions
* Payment Methods
* Payment Processors
* Services
* Jobs
Please follow the below steps to import the BM configurations for the above-mentioned components.
1. Locate the folder metadata in the installation package.
2. Review the contents within the `site-template` folder.
3. Change the site ID under path `site-template\sites` to your site ID.
4. Archive the folder to `site-template.zip` and import the file via `Site Import & Export`.
### Services
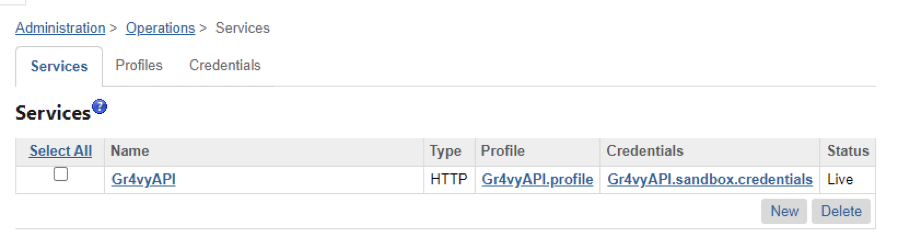
The integration includes a new service named `Gr4vyAPI` which can be accessed from **Administration** -> **Operations** -> **Services**.
 #### Service Details
| Service ID | Service Profile | Service Credential |
| ---------- | ------------------ | --------------------------------- |
| `Gr4vyAPI` | `Gr4vyAPI.profile` | `Gr4vyAPI.sandbox.credentials` |
| | | `Gr4vyAPI.production.credentials` |
The URLs for the sandbox and production credentials need to be configured with the URL of your Gr4vy
instance. For example, if your Gr4vy instance ID was `example`, the URL for your sandbox credentials
would be `https://api.sandbox.mattildapayments.com` and the URL for your production credentials would be
`https://api.mattildapayments.com`.
### Payment Processor and Payment Method
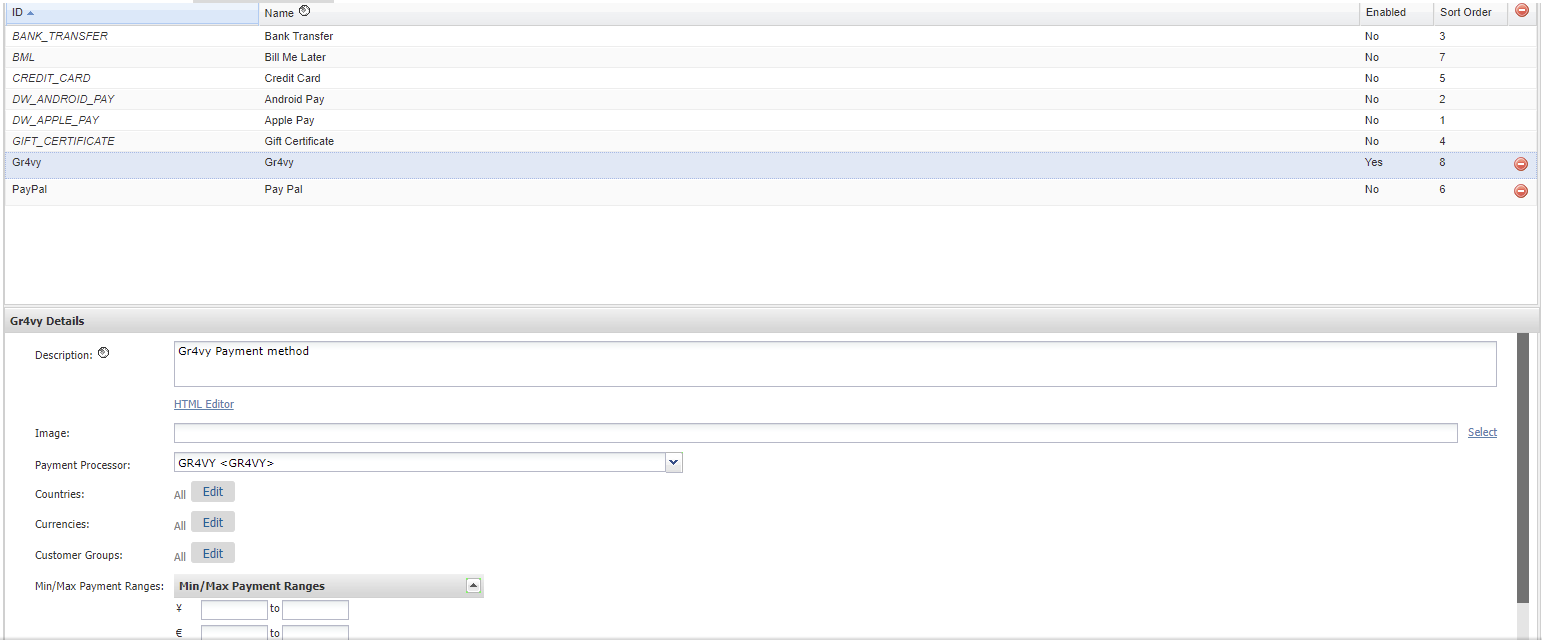
The cartridge includes a Processor called `GR4VY` which should be mapped to the Gr4vy Payment Method
under **Merchant Tools** -> **Ordering** -> **Payment Methods**.
#### Service Details
| Service ID | Service Profile | Service Credential |
| ---------- | ------------------ | --------------------------------- |
| `Gr4vyAPI` | `Gr4vyAPI.profile` | `Gr4vyAPI.sandbox.credentials` |
| | | `Gr4vyAPI.production.credentials` |
The URLs for the sandbox and production credentials need to be configured with the URL of your Gr4vy
instance. For example, if your Gr4vy instance ID was `example`, the URL for your sandbox credentials
would be `https://api.sandbox.mattildapayments.com` and the URL for your production credentials would be
`https://api.mattildapayments.com`.
### Payment Processor and Payment Method
The cartridge includes a Processor called `GR4VY` which should be mapped to the Gr4vy Payment Method
under **Merchant Tools** -> **Ordering** -> **Payment Methods**.
 ### Jobs
The integration includes a new job named `ProcessGr4vyNotifications` available under **Administration** -> **Operations** -> **Jobs**.
The `ProcessGr4vyNotifications` job processes webhook notifications received from Gr4vy at a scheduled interval.
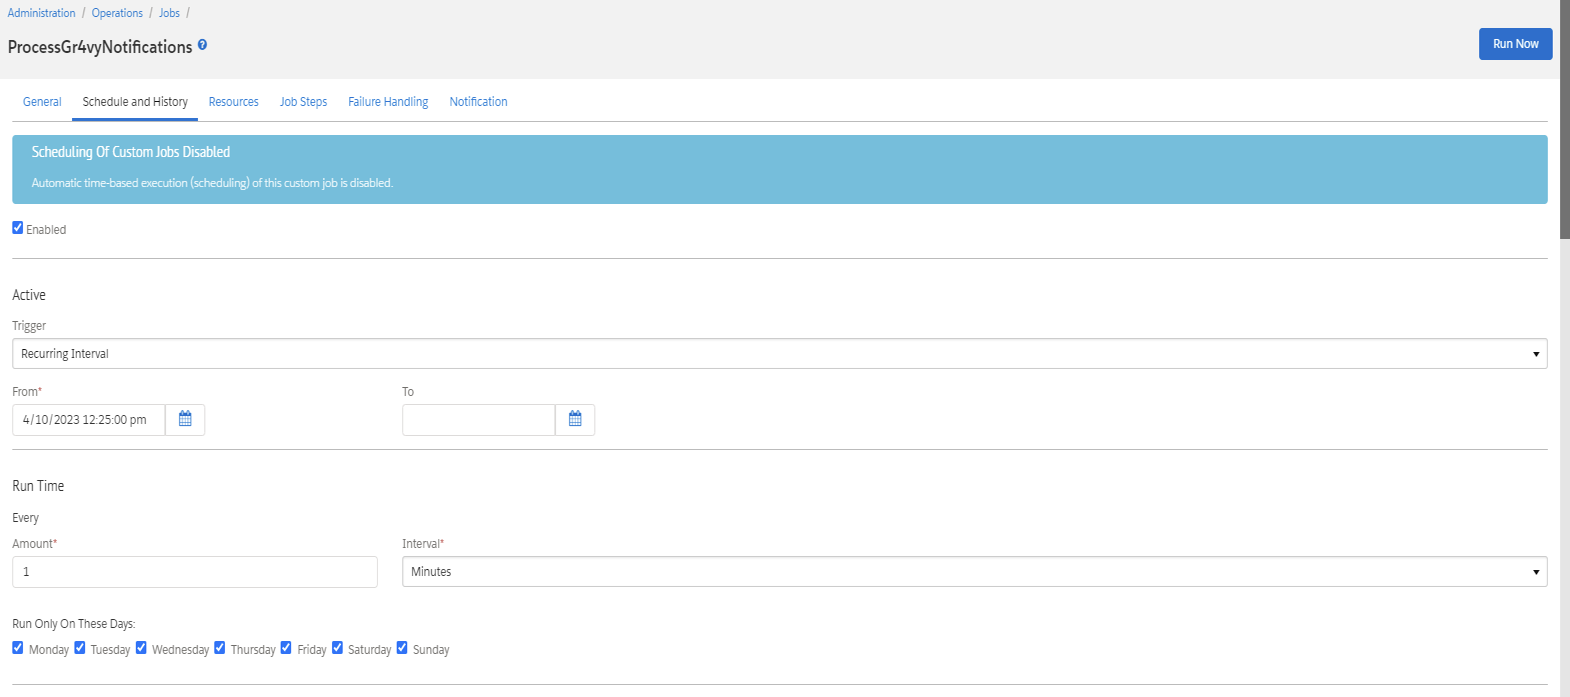
To configure the job, navigate to **Administration** -> **Operations** -> **Jobs** and select `ProcessGr4vyNotifications`. Then on the
**Schedule and History** tab, set the job to run with a recurring interval of 1 minute.
### Jobs
The integration includes a new job named `ProcessGr4vyNotifications` available under **Administration** -> **Operations** -> **Jobs**.
The `ProcessGr4vyNotifications` job processes webhook notifications received from Gr4vy at a scheduled interval.
To configure the job, navigate to **Administration** -> **Operations** -> **Jobs** and select `ProcessGr4vyNotifications`. Then on the
**Schedule and History** tab, set the job to run with a recurring interval of 1 minute.
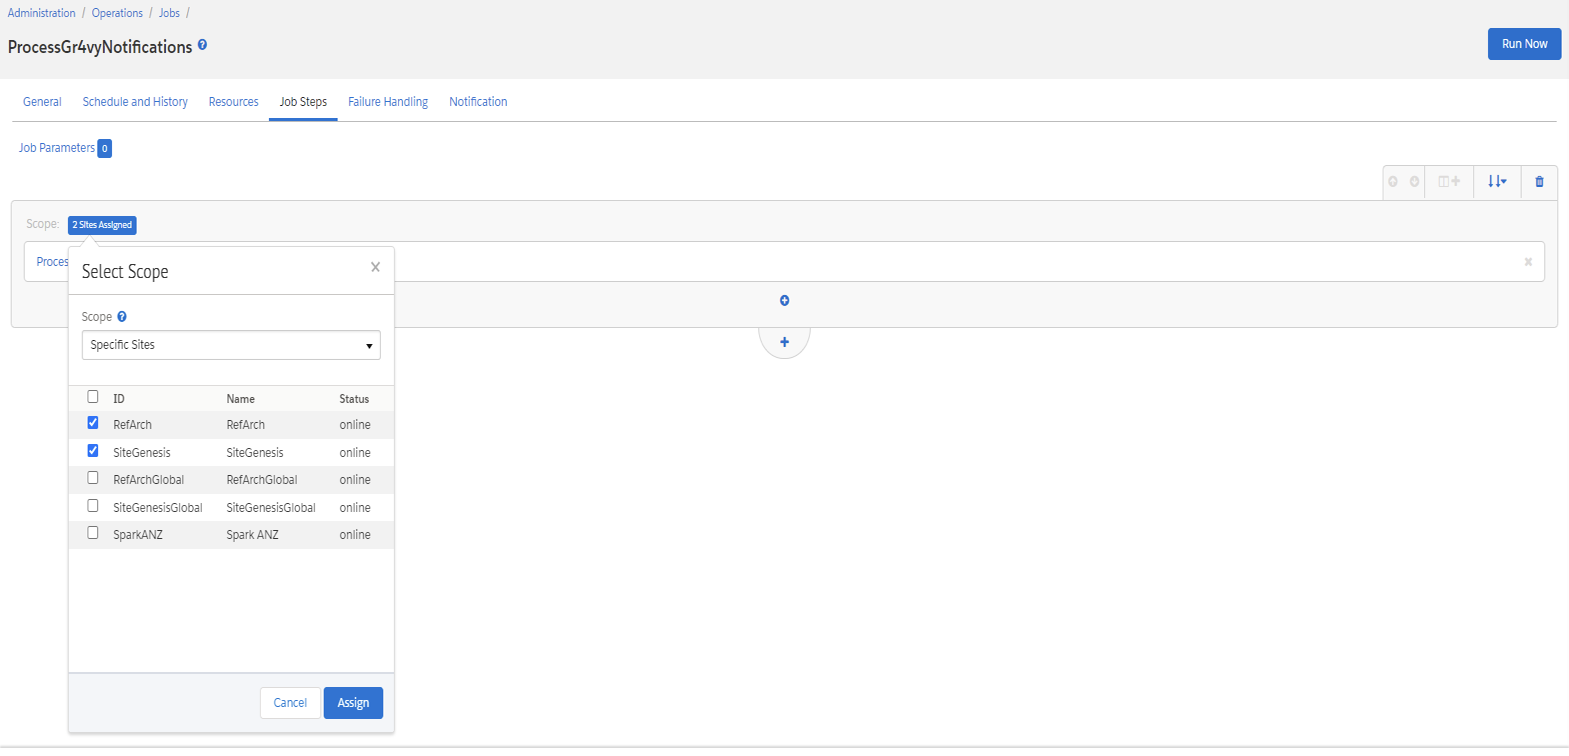
 Then on the `Job Steps` tab, select the `Specific Sites` scope and select the sites where the job is required.